
In this article we’re teach you how to Install and Configure Cacti on CentOS/RHEL 6.
Table of Contents
Some info from Wikipedia:
Cacti is an open-source, web-based network monitoring and graphing tool designed as a front-end application for the open-source, industry-standard data logging tool RRDtool. Cacti allows a user to poll services at predetermined intervals and graph the resulting data. It is generally used to graph time-series data of metrics such as CPU load and network bandwidth utilization.[2] A common usage is to monitor network traffic by polling a network switch or router interface via simple network management protocol (SNMP). The front end can handle multiple users, each with their own graph sets,[2] so it is sometimes used by web hosting providers[3] (especially dedicated server,[4] virtual private server, and collocation providers) to display bandwidth statistics for their customers. It can be used to configure the data collection itself, allowing certain setups to be monitored without any manual configuration of RRDtool.[5] Cacti can be extended to monitor any source via shell scripts and executables.[6] Cacti can use one of two back ends: “cmd.php,” a PHP script suitable for smaller installations, or “Spine” (formerly Cactid), a C-based poller which can scale to thousands of hosts.
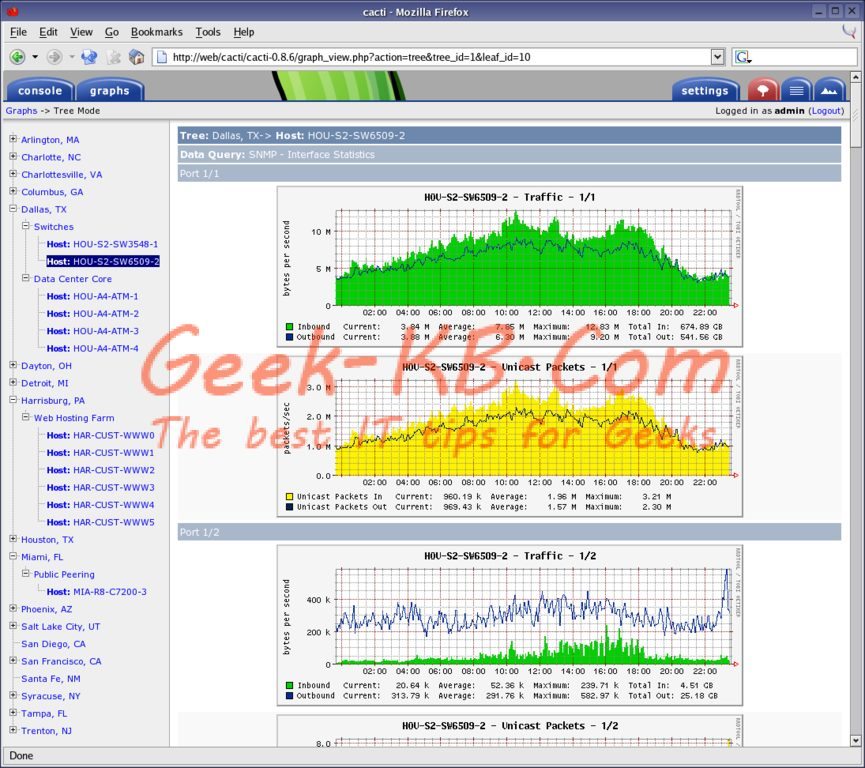
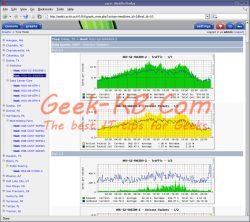
Cacti example
An example of Cacti’s output:
System Requirements:
- A Linux machine connected to the internet.
- MySQL Server – Is used to store Cacti’s data.
- NET-SNMP server – SNMP (Simple Network Management Protocol) – Is a protocol used to network management.
- PHP with net-snmp module – Access SNMP data using PHP.
- Apache / lighttpd / nginx webserver – A Webserver to display graphs created with PHP and RRDTOOL.
The steps are as follows:
Step 1: Install the Cacti software on CentOS/RHEL
Step 2: Configure MySQL server
Step 3: Create the Cacti MySQL database
Step 4: Create a user called ‘cacti’ with password ‘geekkbcacti’
Step 5: Install SNMPD
Step 6: Configure snmpd by editing /etc/snmp/snmpd.conf
Step 7: Install Cacti
Step 8: Configure Cacti
Step 9: Configure httpd
Step 10: Run the Cacti Installer
Let’s Begin!
Step 1 – Install the Cacti software on CentOS/RHEL
Log into your Cacti machine as ‘root’ and run the following command to install mysql, php and apache:
# yum install mysql-server mysql php-mysql php-pear php-common php-gd php-devel php php-mbstring php-cli php-snmp php-pear-Net-SMTP php-mysql httpd
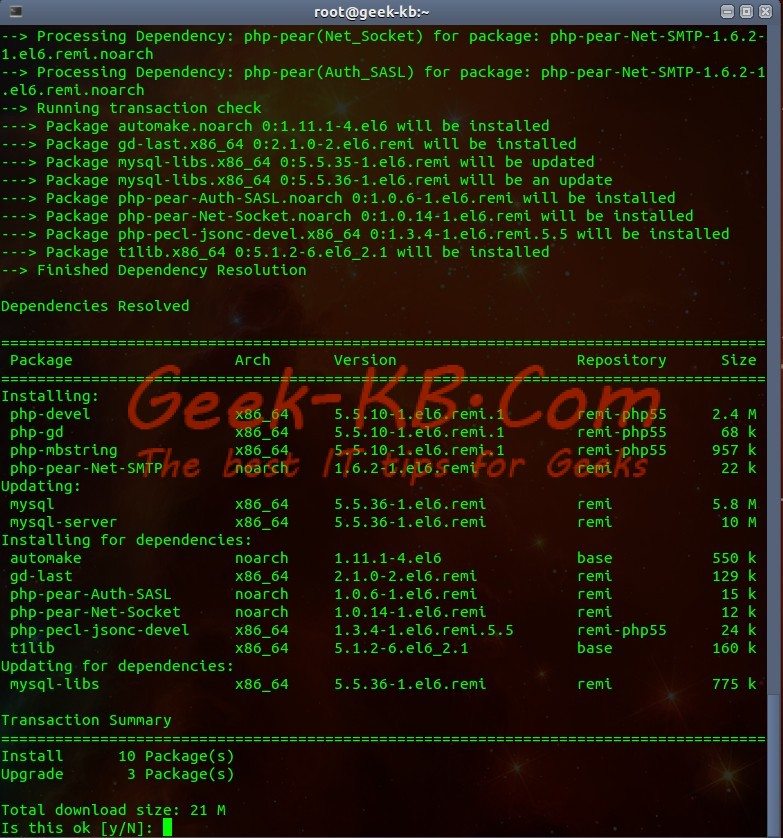
mysql-php-apache installation
Step 2 – Configure MySQL server
First, set a root password:
# mysqladmin - u root password NEWPASSWORD
Step 3 – Create the Cacti MySQL database:
# mysql -u root -p -e 'create database cacti'
Step 4 – Create a user called ‘cacti’ with password ‘geekkbcacti’ :
# mysql -u root -p
mysql> GRANT ALL ON cacti.* TO cacti@localhost IDENTIFIED BY 'geekkbcacti';
mysql> FLUSH privileges;
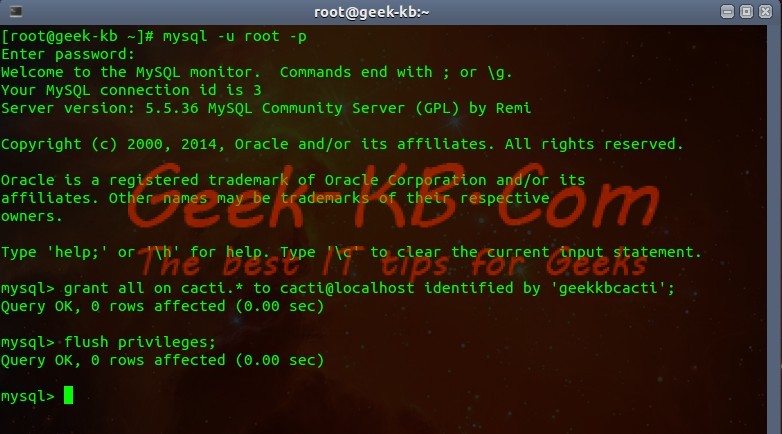
Grant cacti user permissions on Database
Step 5 – Install SNMPD
# yum install net-snmp-utils php-snmp net-snmp-libs
Step 6 – Configure snmpd by editing /etc/snmp/snmpd.conf
# nano /etc/snmp/snmpd.conf
Append / modify it as follows (see snmpd.conf man page for details):
com2sec local     localhost           public
group MyRWGroup v1         local
group MyRWGroup v2c        local
group MyRWGroup usm        local
view all    included  .1                               80
access MyRWGroup ""      any       noauth    exact  all    all    none
syslocation Unknown (edit /etc/snmp/snmpd.conf)
syscontact Root  (configure /etc/snmp/snmp.local.conf)
pass .1.3.6.1.4.1.4413.4.1 /usr/bin/ucd5820stat
Save and close the file (Ctrl + x) and turn on snmp daemon
# /etc/init.d/snmpd start
# chkconfig snmpd on
Make sure SNMP is working properly and giving information by running the following command:
# snmpwalk -v 1 -c public localhost IP-MIB::ipAdEntIfIndex
Sample output:

Running SNMPWalk
Step 7 – Install Cacti
First, make sure EPEL repo is enabled, if it’s not installed or not enabled, follow our article: https://www.geek-kb.com/linux/install-rhel-epel-repo-centos-5-x-6-x/ and Type the following command to install cacti:
# yum install cacti
Install Cacti tables Type the following command to find out cacti.sql path:
# rpm -ql cacti | grep cacti.sql
Sample output:

Find cacti.sql
Type the following command to install cacti tables (you’ll need to type cacti’s user and password):
# mysql -u cacti -p cacti < /usr/share/doc/cacti-0.8.8b/cacti.sql
Step 8 – Configure Cacti
Edit ‘/etc/cacti/db.php’ file, Enter:
# nano /etc/cacti/db.php
Edit these relevant fields:
/* make sure these values refect your actual database/host/user/password */
$database_type = "mysql";
$database_default = "cacti";
$database_hostname = "localhost";
$database_username = "cacti";
$database_password = "geekkbcacti";
$database_port = "3306";
Close and save the file (Ctrl + x).
Step 9 – Configure httpd
Edit ‘/etc/httpd/conf.d/cacti.conf’, enter:
# nano /etc/httpd/conf.d/cacti.conf
Now edit the “Allow From” line, Either set to ALL or enter your LAN subnet to allow access to cacti:
#
# Cacti: An rrd based graphing tool
#
Alias /cacti    /usr/share/cacti

        Order Deny,Allow
        Deny from all
        Allow from 10.0.0.0/24 10.0.1.0/24
Another option is create ‘/usr/share/cacti/.htaccess’ file and password protect the directory. Finally, restart httpd:
service httpd restart
Setup Cacti Cron job: Edit ‘/etc/cron.d/cacti’ file, enter:
# nano /etc/cron.d/cacti
Uncomment the following line:
*/5 * * * * cacti /usr/bin/php /usr/share/cacti/poller.php > /dev/null 2>&1
Save and close the file using Ctrl + X .
Step 10 – Run the Cacti Installer

Cacti first installation
Now, Cacti is ready to Install. Open a web browser and surf to: https://cactiserver/cacti , In my case it’s https://geek-kb/cacti : Now just follow the instructions on screen. The default username and password for cacti is admin / admin. Upon first login, you will be forced to change the default password.

Cacti default login page
I hope you liked this article, please feel free to leave comments or ask questions.
No Comments Yet